Hello friends, many times you might have faced problems of your headphones not working properly or 1 earphone is working and other one is not working.
There can be many problems, such as loose connection form the jack side or the solder disconnected from the middle i.e from where the mic and other volume buttons are there.
Many times our headphone wire is stretched from one end and the solder of the particular wire is disconnected so the that side of earphone is not working.
So i am very much sure everyone might have face this problem, in that case what we do is throw our headphone and buy the new one.
But now why to throw it away when you can repair it, So I'll show you how to repair your headphone when is stretched from one side and make it work like as it was before.
Below is the procedure for repairing your headphone with pics which will be easy for you to understand.
Things you need :
1. Blade or any other sharp material like blade KNIFE will also work.
2. Scissor.
3. Soldering Iron.
4. Soldering Wire.
5. Duct Tape
PROCEDURE:
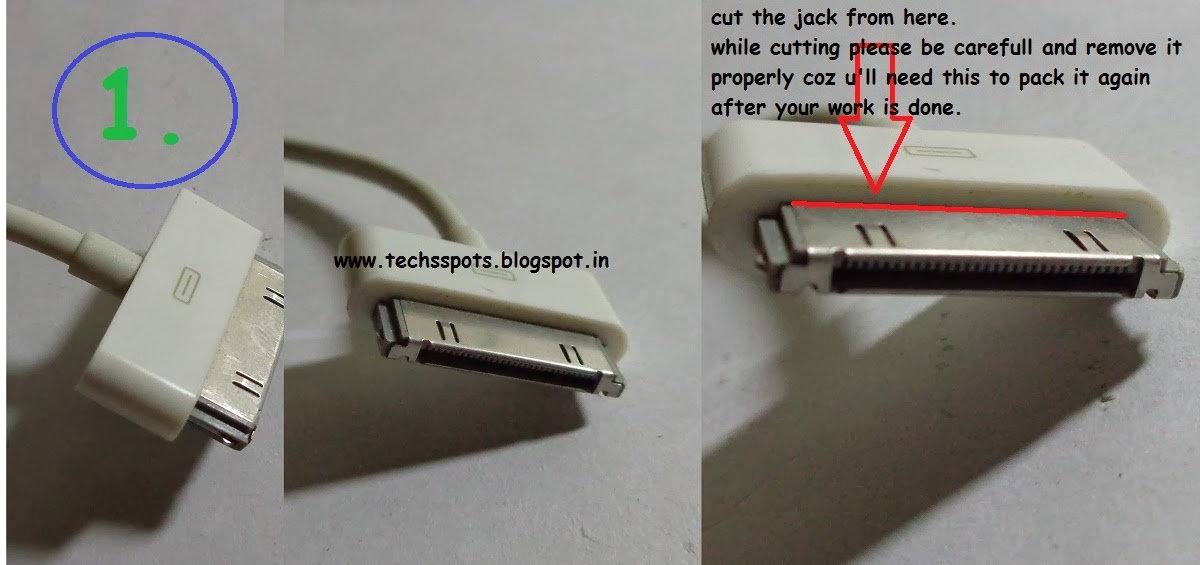
1. Open your headphone where the mic is located.
Please see the fig.1 below for more understanding.
NOTE : while Opening make sure you open it properly b'coz we need to repack it again.
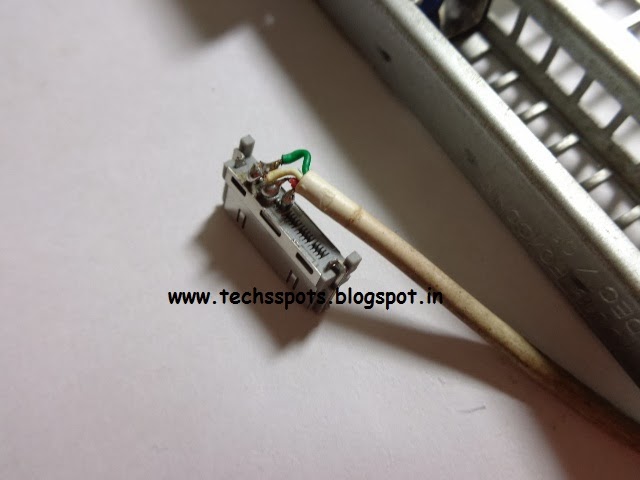
2. When i open it i saw that the one of the soldered wire was disconnected and so that particular earphone was not working. Fig.2
Note: don't bother about Fig.3 its just the back side of the mic cheap and you have nothing to do with it.
3. Since the wire was stretched so i need to connect the whole wire again i.e both the wires of both the earphones.
So i cut the wires as shown in the Fig.4 and unsoldered all the remaining connection.
Note : Please write down or take a snap of the connection on the chip to avoid confusion while resoldering the earphone wires.
4. Fig.5 shows the wire after cutting.
5. After cutting both the earphone wire i checked the whole wire and i got the stretched part of the wire from where the wire was stretched and was disconnected from the solder on the chip.
Then i cut the stretched wire and removed it as shown in the Fig.6
6. After cutting the stretched wire please strip off both the wires properly to solder it back on the chip as shown in the Fig.7
NOTE : Please strip the wires neatly and properly because the chip is sensitive and got very less place for soldering also solder it with great care so that the solder connections do not connect with each other.
7. After striping the wires solder them back on the chip as it was before. you wont get any trouble in soldering if you have taken the snap of the chip before unsoldering it.
So here what i did is i have connected both the earphone wires first with each other since the solder connection on chip was little bit of sensitive.
You can do this or you even connect your earphones individually as it was connected before.
For soldering the earphones wire check out the colors of the wire.
One wire in both the earpiece will be of same color i.e copper wire golden color. so you make a pair of this wires with each other and pair of remaining wires with other.
After
making the pair you solder it as shown in the Fig.8 Please refer to
Fig.9 if you having problem in seeing the image. Fig.9 is the close view
on Fig.8 or see the snap you have taken before unsoldering the wires.
And according to that solder the pair of copper wire and another pair of wires.
8. After soldering the wires on to the chip please check whether the headphone is working with both the earphone or not.
If its working pack the chip with its cover and put the duct tape on it so that it fixes properly and do not come out as shown in Fig.10, Fig.11, Fig.12
If not working then please follow the steps once again do it according to it.
Hope this helped you.
NOTE
: this post will only fix the problem if headphone wire is stretched
or disconnected from the chip i.e near the mic or volume button.
Next time i'll post how to repair your headphone if its disconnected from the Headphone JACK.
If you like the post take a second to say thankyou and subscribe to our blog to get latest updates.
 THINGS U NEED