-->

W E L C O M E

Related Posts Plugin for WordPress, Blogger...

Showing posts with label APPLE. Show all posts

Wednesday, 14 January 2015

MAKE MAC OS BOOTABLE FLASH DRIVE.

DOWNLOAD PDF

Things You Need

1. 8 or 16 GB Flash Drive.

2. OS X Installer File (MAVERICKS or YOSEMITE).
which ever you wanna make it bootable.

3.MAC Machine with atleast "OS X LION"


Insert the Flash Drive and Open The DISK UTILITY.

1. select the flash drive from left panel in the disk utility.
2. Select partition.
3. from partition layout select "1 partition"
4. select the format as "MAC OS EXTENDED (JOURNALED"
5. click on Apple.

Note: all your data will be erased so backup it.


6.Click on "PARTITION" and let the procedure complete.


6.Open Finder & Click on "Application" in the right side.
7. search for the file "INSTALL OS X MAVERICKS or YOSEMITE" as shown in the above image.


8.Right Click the file "Install OS X Yosemite".
9. Select "Show package contents" second option. (as shown in above image)


 10. Open Contents Folder.


11.Open SharedSuppot Folder 


14. Once Your Done with COMMAND in TERMINAL. Open the "OS X Install ESD" mounted on the desktop or from the finder window

Note : All your Open finder windows or folders may close. If it close you have to OPEN it again.


15. You can now see the file in left side of the disk utility i.e BaseSyste.dmg.


16.click an select the BaseSystem.dmg in left side.
17.Click on Restore.
18. Source is already there, you just drag and drop your FLAS DRIVE partition (not the flash drive) in destination place.
Note: mine Flash drive partition in "OS X Base System", You might get UNTITLED or UNTITLED1 or something else.
19.Click On RESTORE now and wait for the procedure to get over. 


20. once it is done, open "FINDER" and click on the "OS X Base System" or the FLASH DRIVE name. which you have given.
21. once your FLASH DRIVE is open click on "SYSTEM" Folder. 


 22. Open "Installation" Folder


Wednesday, 26 February 2014

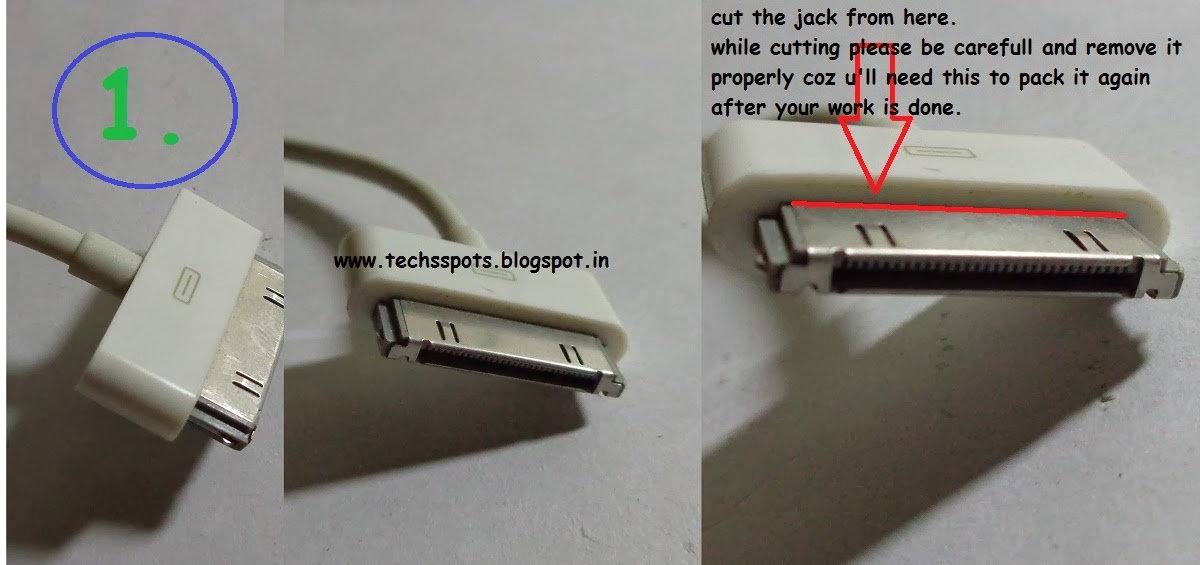
how to repair your 30pin iphone/ipod/ipad and other apple products data cable.

This post will teach you how to repair your 30pin iphone/ipod/ipad and other apple products data cable.

My data cable was working fine but one fine day i dont know what happen it suddenly stopped working. i thought of getting the new one but it was too costly.

So then i thought of repairing my data cable.

Note :  this post will help you only if your data cable is disconnected from the 30 pin connector side and not the usb connector side. If your data cable is disconnected by the usb side then please write to us we will show you the way how connect it.

SO NOW LET US START.

THINGS U NEED
1. SOLDER WIRE.
2. SOLDERING IRON.
3. WIRE STRIPPER FOR WIRES.
4. CUTTER.


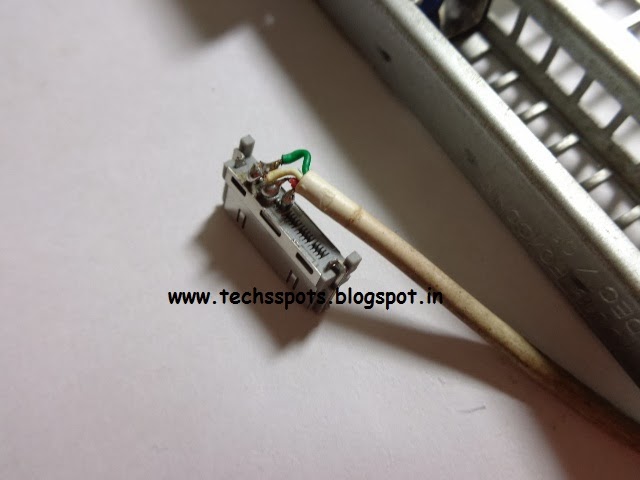
3. STRIP THE WIRES FOR SOLDERING IT ON THE PINS.
PLEASE SEE THE BELOW IMAGE FOR MORE UNDERSTANDING OF THE CONNECTION AND SOLDERING METHOD.


 hope you understand with post and i helped you.
please write us if you have any trouble while doing this.

Saturday, 20 July 2013

Linux vs Macintosh vs Windows (unbiased comparison)

In this article, I will be outlining the pros and cons of the three major operating systems: Linux, Mac and Windows (commonly referred to as "PC"). Keep in mind that there are many other operating systems, but I will not be reviewing them because of their very small market share.

Let's start with the most popular: Windows


With almost 90% of the operating system market share, you can't miss Windows. It's in commercial buildings, industrial facilities, as well as home computers.
Windows, having been introduced in 1985, is a very mature and complete piece of software. Yet, it has it's flaws...

Monday, 15 July 2013

Install Whats App on Your PC-Laptop


BlueStacks App Player 
http://downloads.ziddu.com/download/23697886/BlueStacks-SplitInstaller_native.exe.html

Are you one of those who preferred to buy an Android device rather than going for iOS or any other? If yes is your all, then chances are quite high that you have plenty of apps and games installed on it. Playing games and running apps on Android device, while on the go, is hell lot of fun. There are many incredible apps and games to enhance your experience with Android device.
Well, while playing the games and apps on your Android device, has the idea of playing them on your PC ever hit your mind. Have you ever wondered that if it is possible to run Android apps on PC or not? The answer is- Yes it is Possible! All you need is a software named ‘BlueStacks App Player‘ which will let you make this possible.

What is BlueStacks App Player?


BlueStacks App Player is a highly popular software and one of the best Android emulators that enables to run Android apps on Windows based PC. This is the first ever software of its kind. Since there are many people who wish to play Android apps on their PC, therefore, the BlueStacks app player has got a big user base. As of writing this post, this software has more than 5 million users across the globe.
With BlueStacks, you can all of your favorite apps and games on your computer. You can start using mobile apps such as WhatsApp, Viber and play Android games like Asphalt & Subway Surfers on your Windows based PC. To do so, all you need to have is the intended app or game. You might know that Android apps have .apk extension, so you need to have .apk file of the game or app that you wish to run on your PC. Of course, that is what you can download from Google Play. There is another good feature that you can search for apps and games within BlueStacks only. So, no pain of downloading them on PC first and then transferring to PC. Moreover, you can sync apps from your phone using BlueStacks Cloud Connect Android app.

Download BlueStacks App Player for Windows PC (Offline Installer)


The installer requires  you to have Internet connection, because during the installation, it further downloads the necessary data. This is indeed not good for those who have slow Internet connection. It’s also not good if you want to install BlueStacks again, because for that, you will have to download the files again. Pain!
If you don’t want to go through this pain, then better download the offline or standalone installer (setup file) of BlueStacks App Player for Windows PC. Here are the respective links:

Installing BlueStacks App Player on Windows PC


  • After downloading the offline installer, just run the downloaded file.
  • The installation wizard will start. Just follow the on-screen instructions.
  • The installation will start and will get end in a matter of few minutes.
  • After installing the App Player, just download your favorite Android app or game from Google Play, and load it to the App Player.
  • You can search for the Android apps within BlueStacks App Player as well, and can run them in no time.
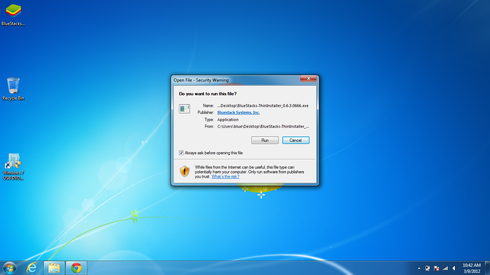
Please double-click the BlueStacks App Player (beta-1)'s Thin Installer downloaded earlier, for example, on your PC's desktop. The Thin Installer is in fact a lightweight installler that manages the download, installation and initiation of BlueStacks on your PC.

You will see a popup from Windows asking for your permission to allow it to install BlueStacks. Please click "Run" to begin installing BlueStacks.


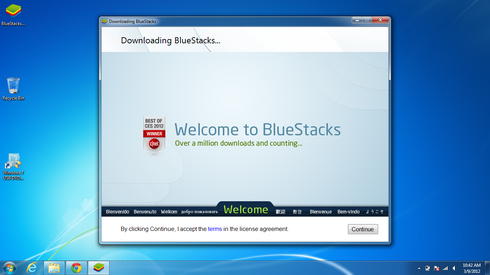
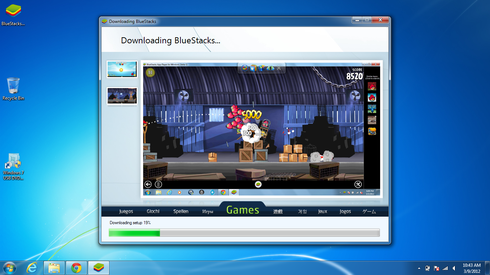
The Thin Installer will begin downloading BlueStacks


You will be able to track the progress of the download


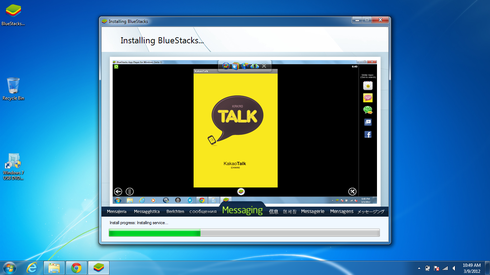
Once the download completes, BlueStacks will be installed immediately.


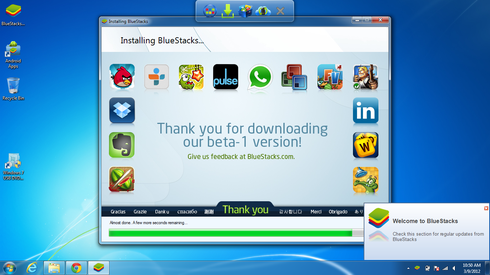
The Thin Installer will install a dock at the top of your screen, an Android Apps folder and shortcut to Start BlueStacks on your desktop. .

 
 After installation bluestack program you will find your program like this. click on the search option top right side of the screen.


 after clicking on the search option you will find your page like this. write the application name you want to install.


 select the application and click on the install button right side. 
NOTE- IF YOUR APPLICATION IS ALREADY INSTALL THEN IT WILL SHOW INSTALLED.


 after clicking on install button it will search for app store after the app store window opens click the first app on right side.


now your application window will be open. click on the install button at top right side.
It will take you to installation process complete the process and your app will be installed. 


That’s it, just download and install BlueStacks on your PC by following the above mentioned steps. Once it is installed, you will be able to use and play most of the Android applications & games like WhatsApp, Instagram, UC Browser, Flipboard, Temple Run, Subway Surfers, Vector, Angry Birds etc. on your computer. So, what are you waiting for? Get BlueStacks on your computer right away!

like